If your self-managed Argonne-owned Mac does not have Self Service installed, it may not be compliant with Argonne and Department of Energy policies. Installing the Self Service app will not only accomplish this, but give you shortcuts to install a number of apps and packages, similar to the Mac App Store.
Installing this does not affect your ability to run your own computer. You remain a full administrator on the machine. You will see a new administrator account – celsadmin. This account is for CELS Systems to be able to provide systems administration on the machine if requested. You are free to disable or remove that account if you desire, understanding it could prevent us from helping with your machine.
The easy way
If your computer is from 2019 or later, please send an email to [email protected] with the serial number and CSI number of your computer. We’ll add it to the right group for co-managed/self-managed machines and let you know when it’s ready. After that, with your computer connected to the internet, you will open your favorite Terminal program and run the command:
sudo jamf removeFramework
sudo profiles renew -type enrollment
(The first command may fail, that’s okay. Its job is to get rid of any leftover bits from an old laptop if Migration Assistant was used.)
This will notify you it will apply the profiles from UChicago Argonne, LLC. Click allow to complete the process. Shortly, an app called “Self Service” will show up on your computer and will open. At this point your computer will have most of the requirements, namely Crowdstrike, Eracent software license auditing, Full Disk Encryption enabled, screen saver lock and timeout, and the DOE privacy notice/login banner at the login screen.
- At this point, you can click the install button on any of the Lab software packages in Self Service if there are packages you’d like installed easily. You can also install software via the usual other routes. Logging in to Self Service will present more software options than the logged out list.
The other way
- In your browser of choice, visit https://jamf-pro.anl.gov:8443/enroll/ and login with your Argonne username and password.
- Click “Continue” when directed to install the MDM profile.
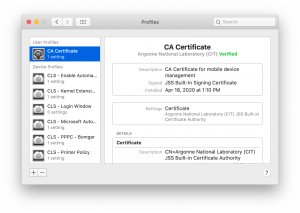
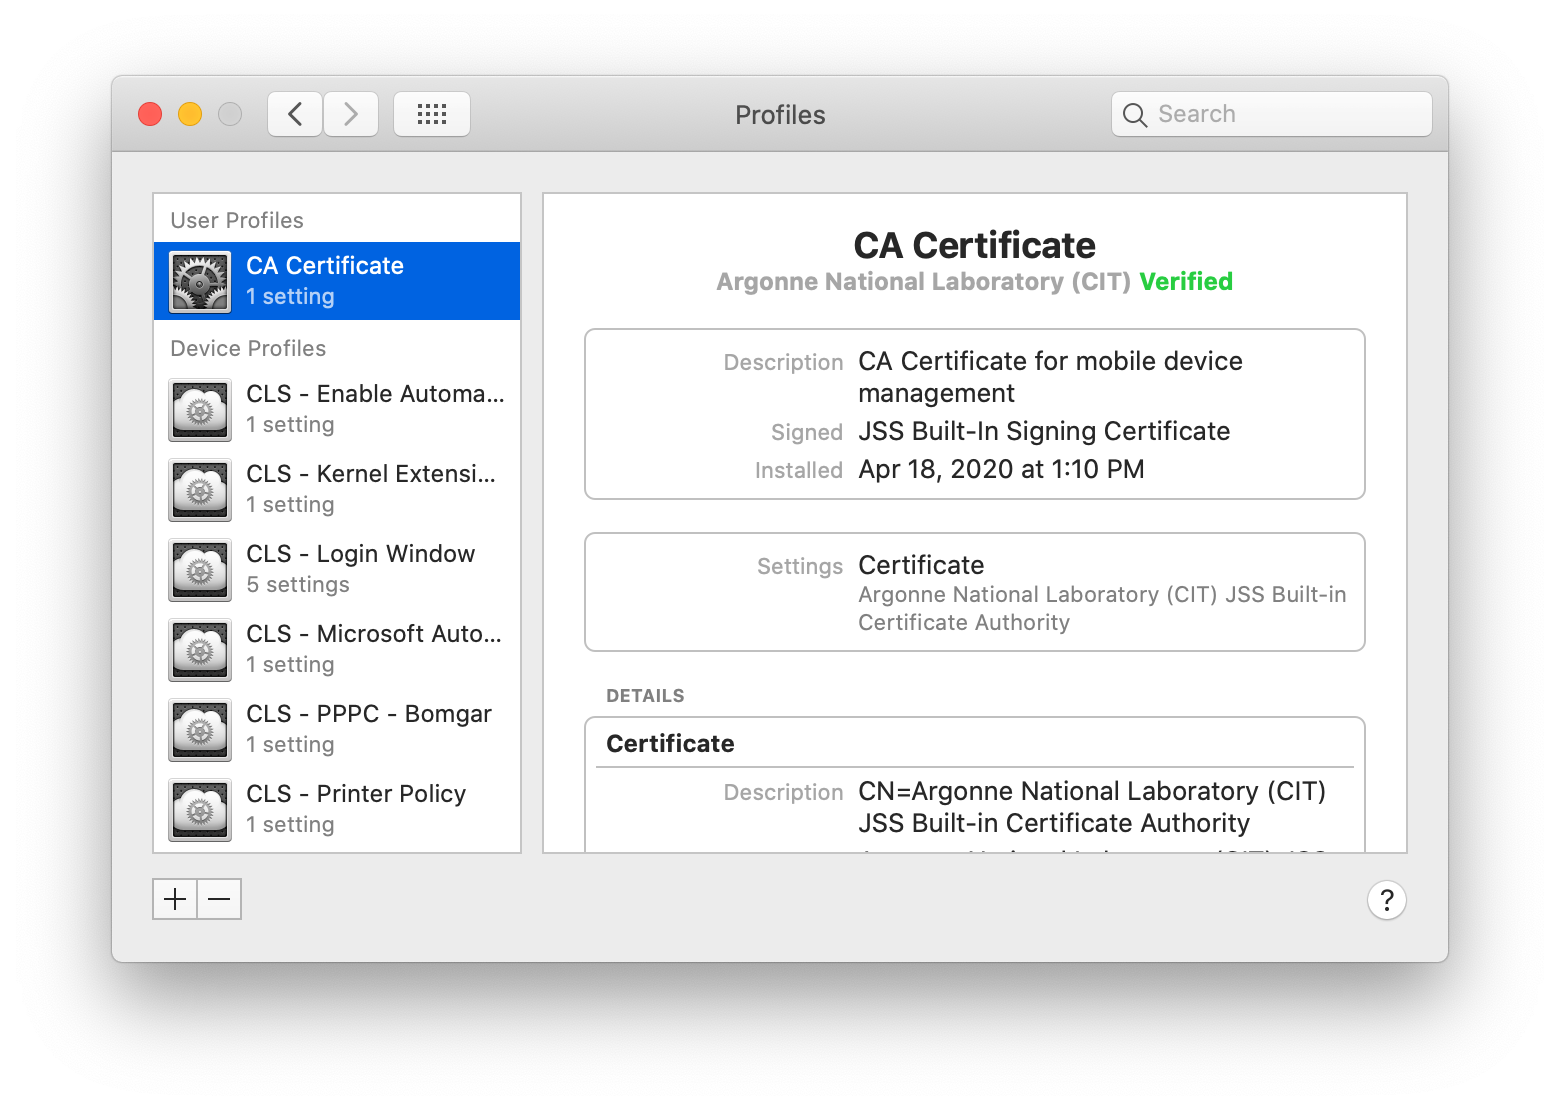
- Click continue to install the CA Certificate.
- In Monterey, the profile will download to your computer. After you open the downloaded file, you will need to open System Preferences and open the “Profiles” preference pane.
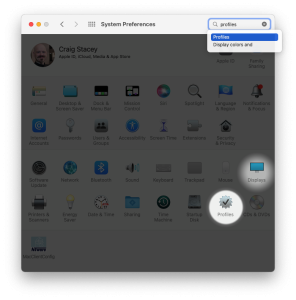
- You will need to click Install on the CA Certificate in that pane before you do the next step
- In Monterey, the profile will download to your computer. After you open the downloaded file, you will need to open System Preferences and open the “Profiles” preference pane.
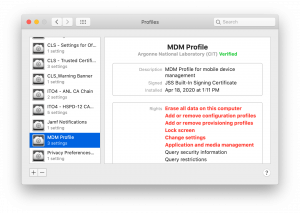
- Click Continue to install the MDM profile.
- As above, this will download, but will not automatically open the preference pane. Follow the same steps.
- Provide your system admin credentials (ie, the user account you created when you set up the computer) to authorize it.
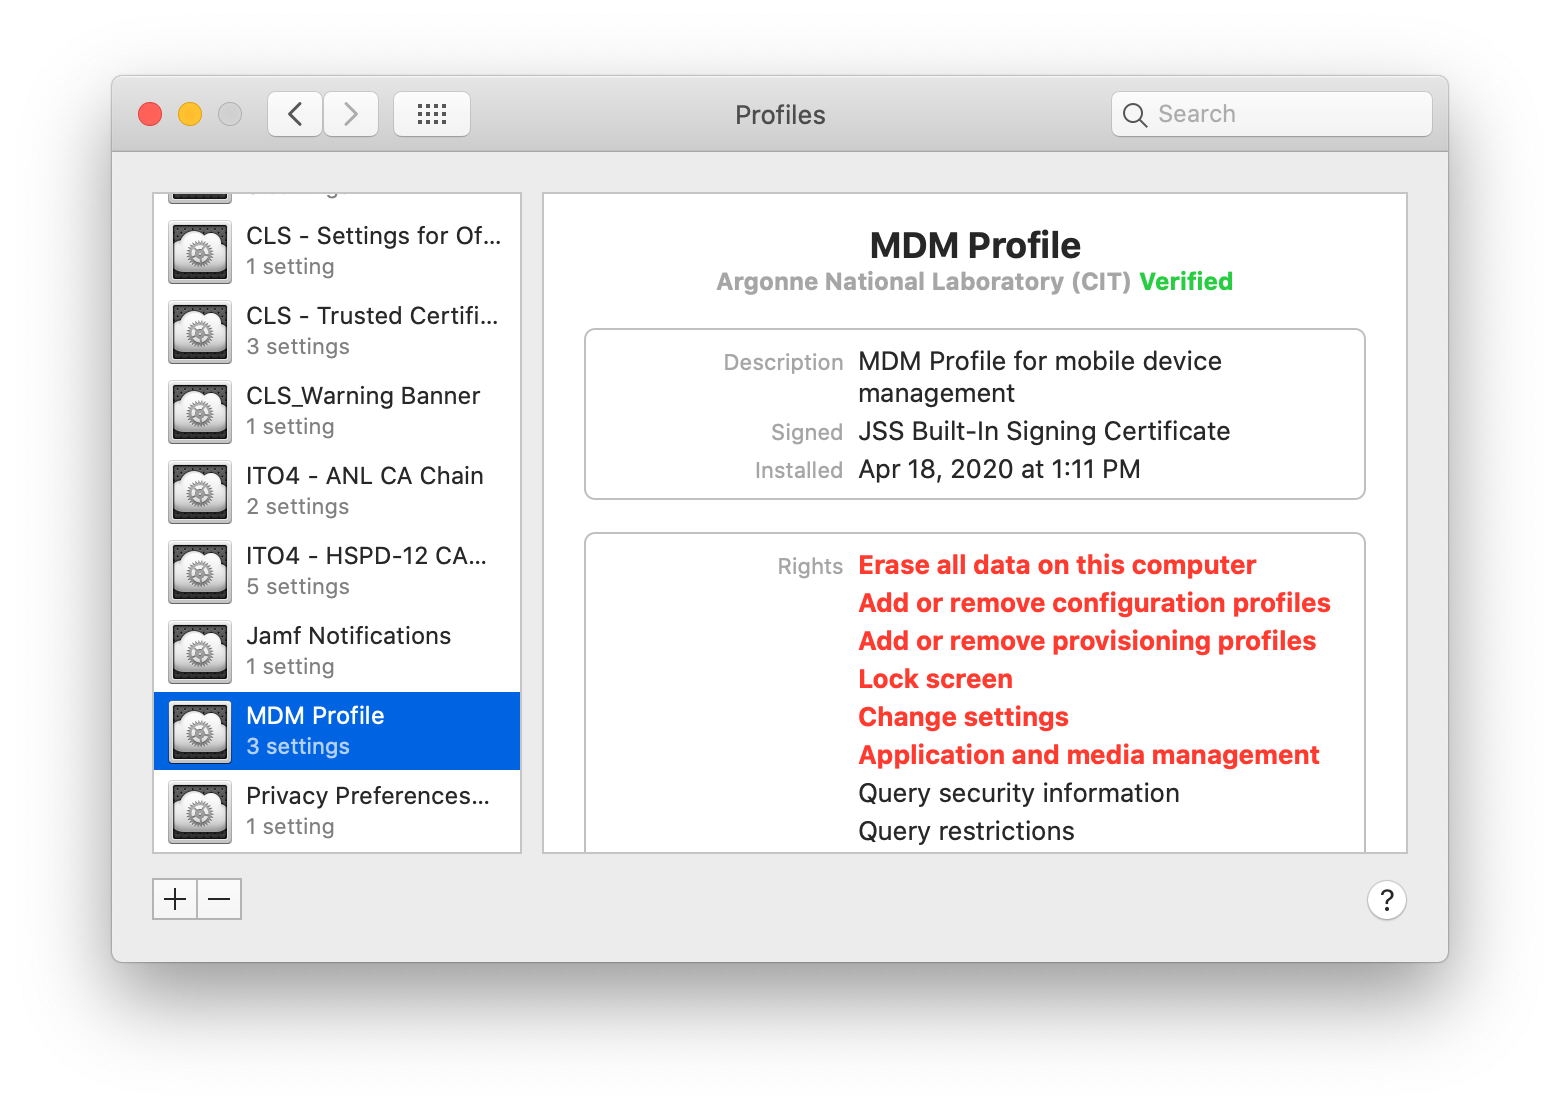
- You should then see a green “Verified” checkmark next to the Argonne National Laboratory title in the MDM Profile.
- A number of other profiles will appear as well. When all is said and done, your Profiles prefpane should look like this:
- Click continue to install the CA Certificate.
- Shortly, an app called “Self Service” will show up on your computer and will open. At this point your computer will have most of the requirements, namely Crowdstrike, Eracent software license auditing, Full Disk Encryption enabled, screen saver lock and timeout, and the DOE privacy notice/login banner at the login screen.

- At this point, you can click the install button on any of the Lab software packages in Self Service if there are packages you’d like installed easily. You can also install software via the usual other routes. Logging in to Self Service will present more software options than the logged out list.